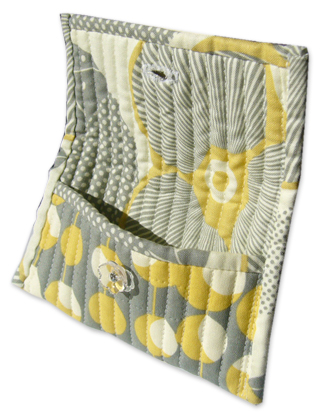
除了做日本寿司, 大概也很少人想到那布卷一卷就可以变成一个简单又不失华丽的插针座吧? 教程请按这里。
Friday, October 23, 2009
Thursday, October 22, 2009
蝴蝶和屋子笔套aka手指娃娃
看到有人这么做就依样画葫芦, 顺便教会我的小虫这个是屋子!哈哈。。。
还记得我有3寸不织布手工制作吗? 我就让自己在3寸不织布料上做手工。
几片不同颜色的3寸不织布就做了2个不是很详细的教程。
小小的教程, 慢慢研究吧!
看不懂再问我吧!^^
还记得我有3寸不织布手工制作吗? 我就让自己在3寸不织布料上做手工。
几片不同颜色的3寸不织布就做了2个不是很详细的教程。
小小的教程, 慢慢研究吧!
看不懂再问我吧!^^
先把3寸不织布剪成两半(大小自己决定吧!)
要准备2份哦!
要准备2份哦!
开始缝制啦!
屋子笔套有两面:前面和后面
首先把门和窗缝在前面, 然后分别前面和后面的的把屋顶给缝好
两个部分都完成后, 就将前面和后面背对背,沿着边缝上
记得要留个小口(需要多大?把笔放进去量一量就知道了)套在笔上
p/s: 要当指娃娃的话, 就用手指量一量吧!
屋子笔套有两面:前面和后面
首先把门和窗缝在前面, 然后分别前面和后面的的把屋顶给缝好
两个部分都完成后, 就将前面和后面背对背,沿着边缝上
记得要留个小口(需要多大?把笔放进去量一量就知道了)套在笔上
p/s: 要当指娃娃的话, 就用手指量一量吧!
缝好后的样子,简简单单。
完成了就套在笔上, 插在我的勿忘我堆里 ^^
刚才剪剩的不织布我动一动脑筋,
刚才剪剩的不织布我动一动脑筋,
就想到把它变成蝴蝶手指娃娃。
首先将剩下的布料稍微修一修变成蝴蝶的身形,
首先将剩下的布料稍微修一修变成蝴蝶的身形,
再根据自己喜欢的图形用不同颜色的不织布剪下备用。
这里忘了拍照
基本上就是把不同形状的不织布直接缝在蝴蝶翅膀上
完成2各翅膀后, 备用。
身体的部分顶端打两个结, 当着是眼睛
两根线拉长一点才剪断, 这个就变成须了
基本上就是把不同形状的不织布直接缝在蝴蝶翅膀上
完成2各翅膀后, 备用。
身体的部分顶端打两个结, 当着是眼睛
两根线拉长一点才剪断, 这个就变成须了
最后将完成后的翅膀缝在蝴蝶身上

Wednesday, October 21, 2009
Flower collections
Found some tutorials for flowers making, so please click on the title to see the instructions yeah!
Dandelion, Echoes of a dream

Topiary, LollyChops

Flower pin, Yoonnie

Yoonie

Pink Paper Peppermints

Dandelion, Echoes of a dream

Topiary, LollyChops
Flower pin, Yoonnie

Yoonie

Pink Paper Peppermints
Retro owl sunglass case
Pink Penguin's tutorials
Thanks to Ayumi allowing me to link her tutorials to this handcraft tutorials collection. She has a wonderful collection of tutorials and if you interested to read more, please visit her website: Pink Penguin. Click at the title to see the instructions in her website. ^^

Reversible Tissue Box Cover
Teapot

Reversible patchwork bag

Stylish pen case


Reversible patchwork bag

Monday, October 19, 2009
Socks: Milk Cow
Resource: 天涯红人
1、准备材料和工具:棉袜、针线、剪刀、填充棉、黑色扣子两只、棕色不织布、普通黑布一小块
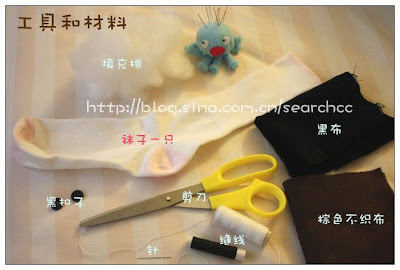
2、首先往袜子底部填入足量的棉花,剪下

3、把剪下来的袜底部分缩缝,抽紧;这就是小牛的头部
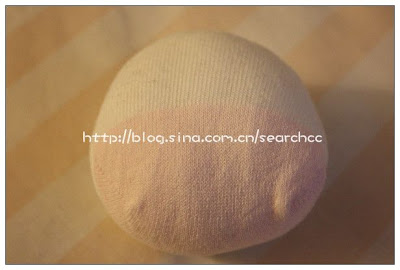
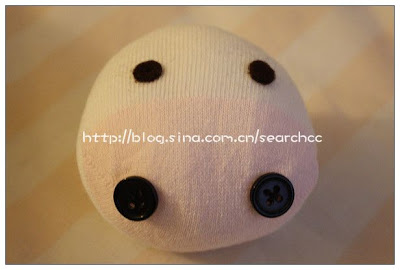
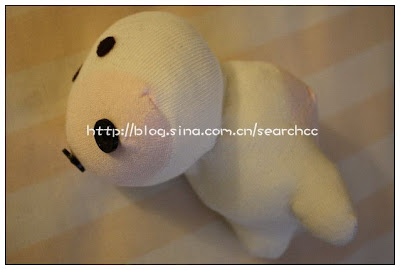
4、用棕色不织布剪成眼睛,黑色扣子作为鼻孔,缝在头上
5、把剩下的袜子如图画上小牛脚脚的形状

6、按照画好的记号,留一定的缝边,剪下
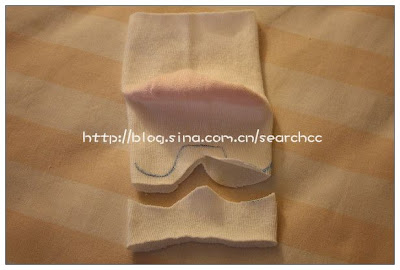
7、翻到袜子里边,沿记号线缝合

8、再翻到袜子正面,然后填入棉花,小牛的身体就做好了
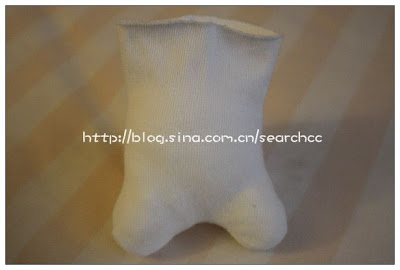
9、把头和身体缝合
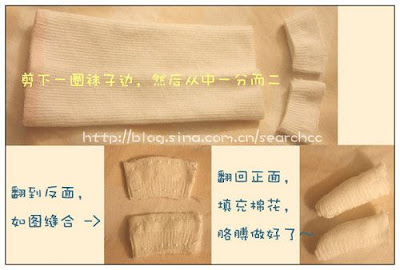
10、做小牛的胳膊
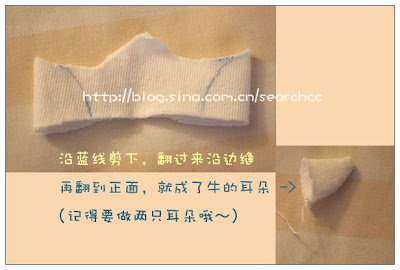
11、利用袜子剪剩的边角碎料,做两只小牛的耳朵
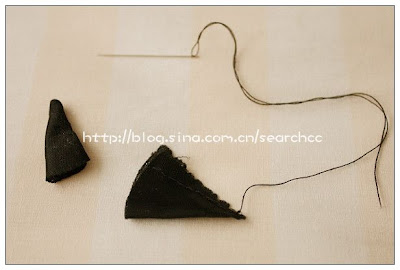
12、再剪两块三角形的黑色布,翻到反面对折缝合,这就是小牛的角~
13、最后,把小牛的胳膊缝到身体上,耳朵和角缝到头上,可爱的袜子小牛就大功告成了!
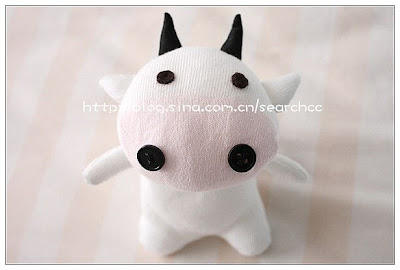
你学会了吗?试着亲手做一只小牛娃娃吧~做好了记得交作业哦~~
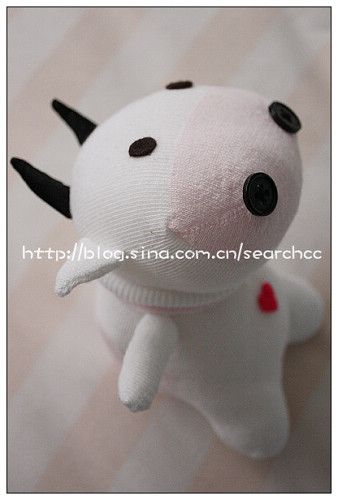
附注:如果你愿意的话,可以用红色不织布剪一个心,贴到小牛肚子上,还可以给小牛加一个“项圈”(从袜子上剪下一圈,套到小牛的脖子上即可),让小牛更加可爱~~
1、准备材料和工具:棉袜、针线、剪刀、填充棉、黑色扣子两只、棕色不织布、普通黑布一小块

2、首先往袜子底部填入足量的棉花,剪下

3、把剪下来的袜底部分缩缝,抽紧;这就是小牛的头部

4、用棕色不织布剪成眼睛,黑色扣子作为鼻孔,缝在头上

5、把剩下的袜子如图画上小牛脚脚的形状

6、按照画好的记号,留一定的缝边,剪下

7、翻到袜子里边,沿记号线缝合

8、再翻到袜子正面,然后填入棉花,小牛的身体就做好了

9、把头和身体缝合

10、做小牛的胳膊

11、利用袜子剪剩的边角碎料,做两只小牛的耳朵

12、再剪两块三角形的黑色布,翻到反面对折缝合,这就是小牛的角~

13、最后,把小牛的胳膊缝到身体上,耳朵和角缝到头上,可爱的袜子小牛就大功告成了!

你学会了吗?试着亲手做一只小牛娃娃吧~做好了记得交作业哦~~
附注:如果你愿意的话,可以用红色不织布剪一个心,贴到小牛肚子上,还可以给小牛加一个“项圈”(从袜子上剪下一圈,套到小牛的脖子上即可),让小牛更加可爱~~

Weird Stuff Doll
Although this tutorial is using a towel, but I feel that it also suitable to make from felt.
Thanks to Itziar allowing me to post the tutorials in the blog. The original resource can be read from here but they are in Spanish. I will try to put in some description when I am free later.
Let's see the instructions:
Thanks to Itziar allowing me to post the tutorials in the blog. The original resource can be read from here but they are in Spanish. I will try to put in some description when I am free later.
Let's see the instructions:
Friday, October 16, 2009
Mushroom Business Card Holder
Resource: Wee Folk Art

For a totally unique and fun business card holder, make our Mushroom! The mushroom cap is on the top flap and the stem remains on the lower portion. The finished size is approximately 2 3/4" x 3 3/4" and will hold standard sized business cards. Make one for yourself and several for gift giving.
For instructions to make your own, please read here.
Wee Folk Art also has a good collection of Stitches glossary, and personally I felt this is essential and perfect ideas for new learners to learn how to sew when they start doing their felt craft!
Tuesday, October 13, 2009
Saturday, October 10, 2009
Make a gift bow from a magazine page
Resource: How about orange
 In gift wrap emergencies when you've got the present but need some wrapping, here's an idea for turning a magazine page into a bow. (There may be better ways to stick this thing together, but I used what I had on hand: staples and adhesive glue dots.
 Cut a magazine page into 9 strips, 3/4" wide. Leave 3 of the strips full length. Cut one inch off 3 of the strips. Cut two inches off 2 of the strips. Cut the last strip down to 3 1/2" long.
 Twist each strip to form a loop at both ends and staple it in the center. Shape the last, short strip into a circle and secure it with a glue dot.
 Layer the 3 longest pieces on top of each other, spacing them evenly and securing each with a glue dot. Add the next two groups of pieces, doing the same. And finally, stick the loop into the center.

 Use other papers, like a map of your city. Here's Chicago. Anybody see your street?
 In gift wrap emergencies when you've got the present but need some wrapping, here's an idea for turning a magazine page into a bow. (There may be better ways to stick this thing together, but I used what I had on hand: staples and adhesive glue dots.
 Cut a magazine page into 9 strips, 3/4" wide. Leave 3 of the strips full length. Cut one inch off 3 of the strips. Cut two inches off 2 of the strips. Cut the last strip down to 3 1/2" long.
  Twist each strip to form a loop at both ends and staple it in the center. Shape the last, short strip into a circle and secure it with a glue dot.
  Layer the 3 longest pieces on top of each other, spacing them evenly and securing each with a glue dot. Add the next two groups of pieces, doing the same. And finally, stick the loop into the center.
 Use other papers, like a map of your city. Here's Chicago. Anybody see your street?
Subscribe to:
Comments (Atom)
Felt supply 不织布出售 (taking orders now~)
After seeing so many felt handcraft and you wish to make some for yourself and friends but do not know where to get the felt supply?!
I'm please to announce that I'm providing this service.^^
Measurement: approximately 9" x 12"
Price: RM1.70 per piece (0.55 USD)
Minimum order is 5 pieces of felt and the colors are as follow:
Click here to view larger picture.
When you place the order, please indicate the number of pieces for each felt color.
看了那么多的不织布手工和教程, 是不是也引起你的兴趣想给自己或朋友做一个? 是不是不知道要到那里购买不织布呢? 呵呵, 这一回你们不用再烦恼啦!! 从今天开始我就提供不织布销售服务, 解决你的烦恼:)
尺寸: 大约 9 X 12 寸
价钱: 一张 RM1.70 (0.55美金)
每次定购最少5 张, 订购时请清楚地例出购买的颜色和张数
颜色名称请参考上面的图画。更清晰的照片请看这里。
P/S: E6 - out of stock E6 - 缺货
Please place your order here. Shipping method please see here.


