Patchwork pencil case instructions in Mandarin from Daya.
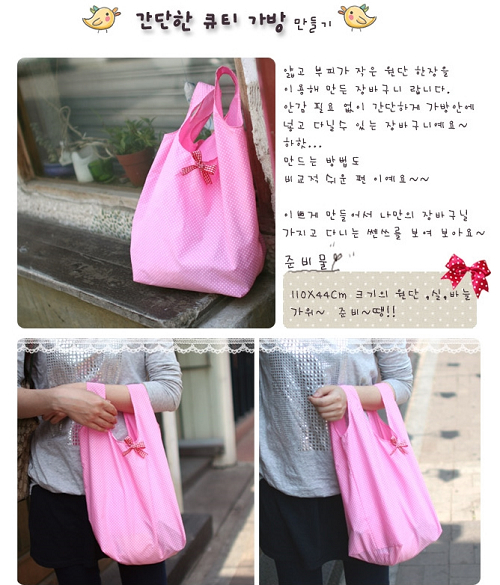
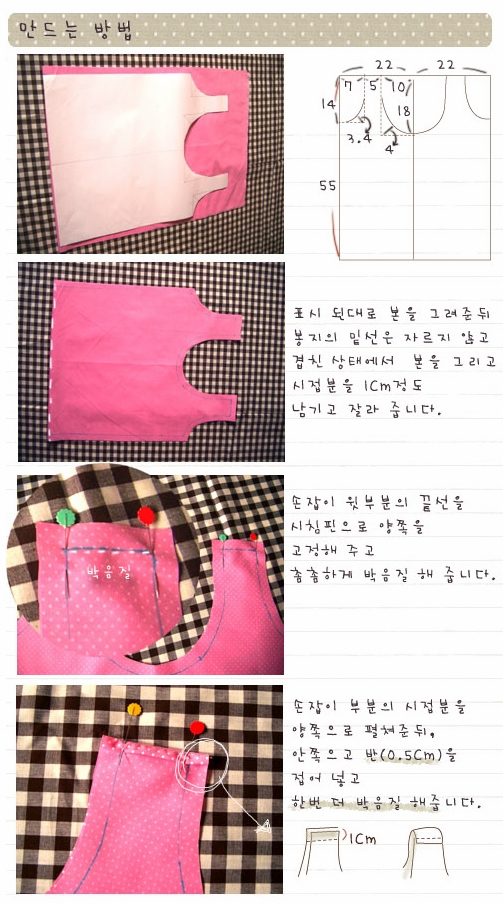
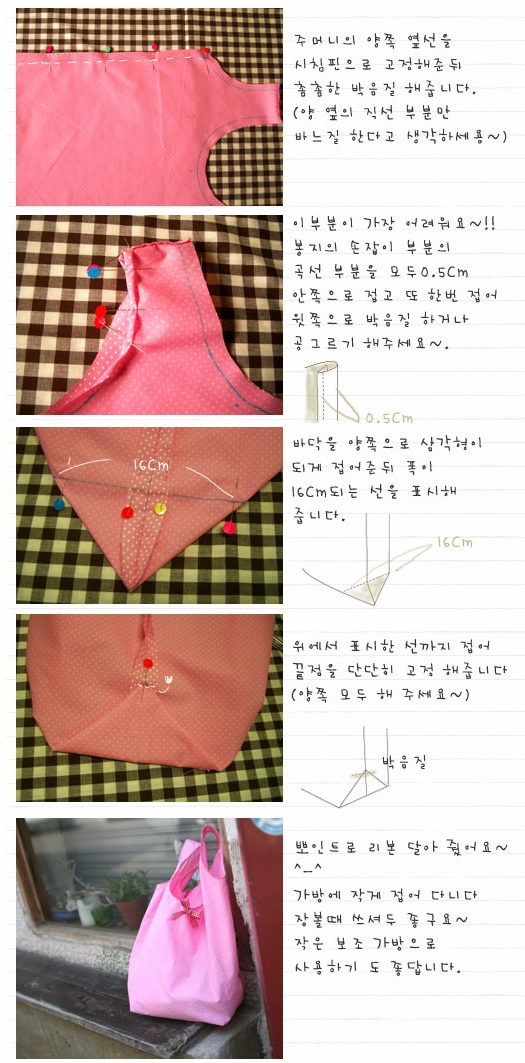
Click here to view the tutorial. Click here for template.
Showing posts with label Patchwork. Show all posts
Tuesday, November 2, 2010
Monday, November 2, 2009
Mobile birds deco with cloth or felt template
Resource: http://delgrande.blogspot.com/search/label/Artesanato
Can you do also with other pets such as elephant or flowers!


Can you do also with other pets such as elephant or flowers!


隔热手套
Resource: http://blog.yuvia.org/

圣诞节party,我准备了一只隔热手套送同事。不怕男女老少,大家都有饮食需求。
这个隔热手套挺有趣,看起来不像个手套,是不是?其实做饭时嘛,需要隔热的也就是手指那里而已。不仅是一只手套,放平了,还是一只造型美观的隔热垫。布料干干净净,很有“煮”意。
下面有个图片教程,不过做的手套是不能平铺的,比上面的难一些。


圣诞节party,我准备了一只隔热手套送同事。不怕男女老少,大家都有饮食需求。
这个隔热手套挺有趣,看起来不像个手套,是不是?其实做饭时嘛,需要隔热的也就是手指那里而已。不仅是一只手套,放平了,还是一只造型美观的隔热垫。布料干干净净,很有“煮”意。
下面有个图片教程,不过做的手套是不能平铺的,比上面的难一些。


Wednesday, October 21, 2009
Pink Penguin's tutorials
Thanks to Ayumi allowing me to link her tutorials to this handcraft tutorials collection. She has a wonderful collection of tutorials and if you interested to read more, please visit her website: Pink Penguin. Click at the title to see the instructions in her website. ^^

Reversible Tissue Box Cover
Teapot

Reversible patchwork bag
Stylish pen case


Reversible patchwork bag

Monday, September 21, 2009
How to Make Felt Yo-Yo Flowers
Resource: Zakka Life
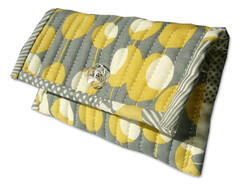
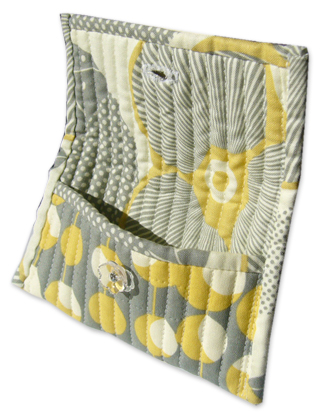
You'll be surprised to see how easy these felt yo-yo flowers are to make. It took me maybe five minutes per felt flower, seriously. These little flowers are great to use for adorning handbags, hair clips or broaches. You could even make a pretty garland with them. Simple directions below.

To start you're going to make a basic yo- yo. The only thing you'll do different is not fold the fabric over when sewing around the circle. There's no need since the fabric will not fray. Also the center will end up to bulky if you fold the fabric over.
For these flowers I used a 5" diameter circle pattern. My stitches were about a centimeter. apart.
Felt Flower Yo-Yo #1
With a pair of fabric scissors, cut your yo-yo where you see the yellow lines. Sew a button in the center. Done.
Felt Flower Yo-Yo #2
With a pair of fabric scissors, cut your yo-yo where you see the yellow lines. Be careful not to cut where the stitching is. Sew a button in the center. Done.
By changing the width and depth of the cuts you can get a large variety of flower shapes. If you want to make garland just string them on ribbon, you don't have to do anything extra to them.


To start you're going to make a basic yo- yo. The only thing you'll do different is not fold the fabric over when sewing around the circle. There's no need since the fabric will not fray. Also the center will end up to bulky if you fold the fabric over.
For these flowers I used a 5" diameter circle pattern. My stitches were about a centimeter. apart.
Felt Flower Yo-Yo #1


How to Sew Fabric Yo-Yo's
Resource: Zakka Life
This week I plan on sharing a few unique yo-yo craft projects. But first, I thought I would share how to sew a basic yo-yo. This technique was first shown to me by my Grandmother and I've been making them this way ever sense. There's something about making yo-yo's that's very therapeutic or zen like. They also make for great projects to take along with you on the bus, at the park, etc.
Supplies:
fabric pen, chalk or pencil
scissors
strong thread
fabric
cardboard
Geometry compass (optional)
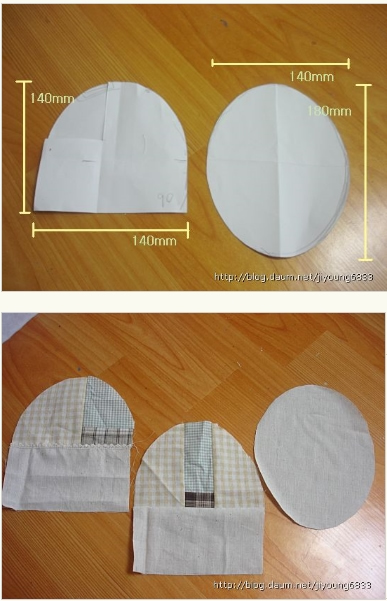
With the geometry compass draw a circle with a 5 inch diameter onto the cardboard. If you don't have a geometry compass, try using a small plate or saucer to trace a circle. It' s okay if the circle isn't 5 inches in diameter. You'll just end up with a larger or smaller yo-yo depending on the size of your plate. Cut out cardboard circle. Trace the circle onto fabric. Cut out circle.
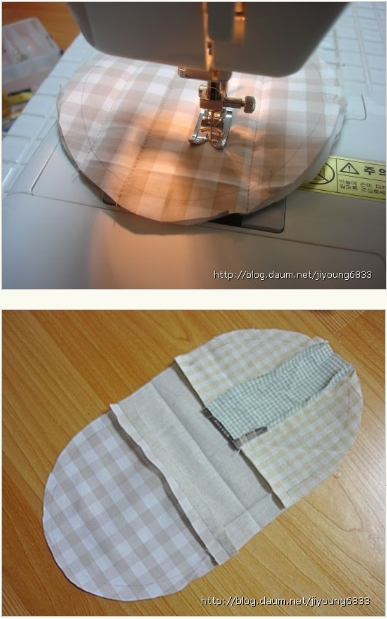
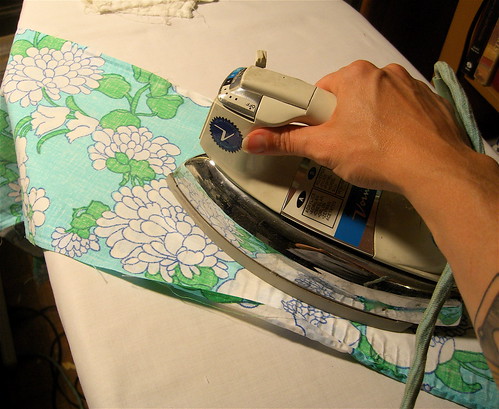
With the wrong side of the fabric facing up, fold the edge over about 1/4". Using a running stitch, sew around the entire circle close to the fold (refer to picture).
This is what your yo-yo should look like once you stitched all the way around the circle.
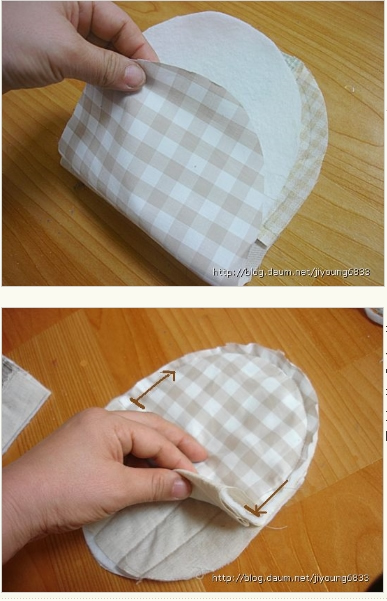
This is what the back (right side of fabric) will look like.
With the needle still on the thread, pull the thread tightly so the fabric cinches together. This is why you need strong thread, to keep the thread from snapping. Flatten and shape the yo-yo. Run the needle through the center back of the yo-yo and tie off. Done!

You now have made your first yo-yo! You can change the size of the hole and gathers by adjusting the size of your stitches. For example, larger stitches will yield a smaller hole.
You can also buy yo yo makers which help guide your stitches. There are even heart and flower shaped yo-yo makers you can purchase.

Supplies:
fabric pen, chalk or pencil
scissors
strong thread
fabric
cardboard
Geometry compass (optional)


You can also buy yo yo makers which help guide your stitches. There are even heart and flower shaped yo-yo makers you can purchase.
Sunday, September 20, 2009
recycled bath mat
Resource: thenewnew.blogspot.com
recently the towel that my husband has been using since college (!) sustained some injuries that made it unusable:
unusable as a towel, that is. as the base for a new bath mat, it was perfect. and so i embarked on a project to dress up our bathroom.
materials:
- an old towel
- a yard or so of fabric that you'd like to place your just-out-of-the-shower feet on [i used the ruffle from an old bedspread]
- pins
- needle and thread, or sewing machine
method:
1) cut your towel into two equal-sized rectangles, at whatever size will fit best in your bathroom.
2) iron your fabric, and cut it into strips that are 4-1/2" wide, and 4" longer than the sides of your rectangle in length (so, unless you've cut squares out of your towel, you'll have 2 strips of one length and 2 strips of another).
3) iron down a 1/4" fold on each of the long sides of the strips, then fold in half and iron the whole strip flat, until it looks like this:
then fold back 2" at the short ends of each strip, and iron down.
4) place the two rectangles of towel on top of each other, lined up neatly. then place the strips of fabric under the edges of the towels and fold them over at the crease that you ironed in, so that they create a border. follow the photos below to make neat corners:
5) if you like the way it looks at this point, just sew a straight stitch along the inside edges of the border, being sure that you catch both the front and back edges, and you're all done!
6) however if, like me, you're not crazy about the color of your towel, or just want more of the fabric in the design, or just want to make life more difficult for yourself, you can keep going. i decided to fill in the middle with a lattice design, like the back of an old lawn chair. if you are going to go this route, don't sew that broder fabric down just yet....
start by cutting a bunch of strips of fabric in a width that looks appealing to you (i used 2"). remember to add a 1/2" to that width for finishing the edges. measure the open space of your mat that you need to fill, and figure out how many strips you need to cut to fill it. for length, cut them an inch longer than the open space, to allow for them to overlap (or, acutally, underlap) with the border fabric.
iron down a 1/4" on each of the long sides of the strips, then sew them down with a straight or zig-zag stitch.
**if you are working with a fabric that's prone to fraying, add 1" to the width that you decide on for the strips, and fold the edges of the fabric over on themselves again before sewing down.
7) weave the strips together...
...pin them around the edges, and baste them to the towels.
8) then put the border fabric back in place, fold it over the lattice, and pin it down. sew a straight stitch along the inside edges of the trim, being sure that you go through both the front and back edges.
and that's all!
Fabric bucket tutorial
Resource: pippijoe.blogspot.com

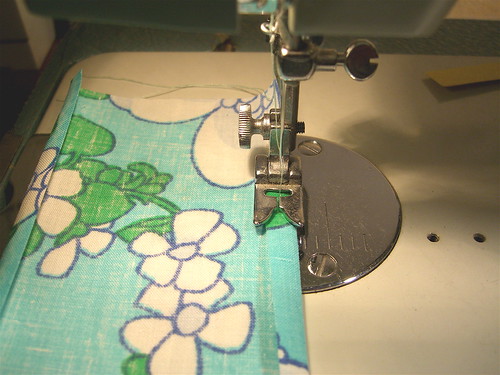
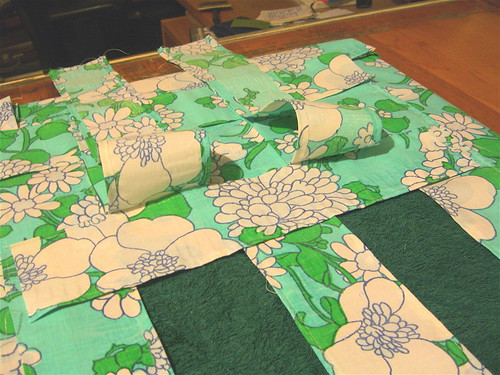
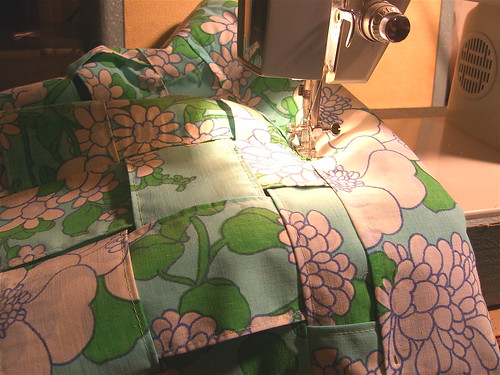
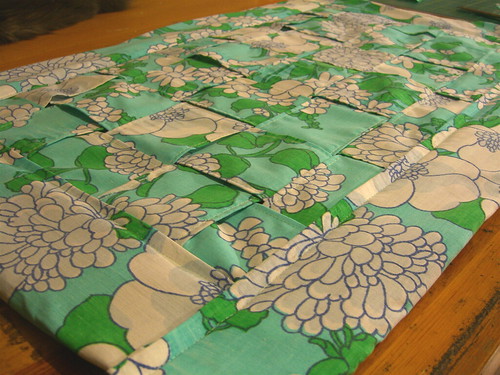
Enough of all the containers!!! This is the last post about them I promise! I've been asked a few times for instructions on how to make them so I thought I'd post a tutorial. This is a very easy project. The hardest bit is to get the base and the sides to meet up neatly. If anyone has any tips on how to make that easier - please share!

Subscribe to:
Posts (Atom)
Felt supply 不织布出售 (taking orders now~)
After seeing so many felt handcraft and you wish to make some for yourself and friends but do not know where to get the felt supply?!
I'm please to announce that I'm providing this service.^^
Measurement: approximately 9" x 12"
Price: RM1.70 per piece (0.55 USD)
Minimum order is 5 pieces of felt and the colors are as follow:
Click here to view larger picture.
When you place the order, please indicate the number of pieces for each felt color.
看了那么多的不织布手工和教程, 是不是也引起你的兴趣想给自己或朋友做一个? 是不是不知道要到那里购买不织布呢? 呵呵, 这一回你们不用再烦恼啦!! 从今天开始我就提供不织布销售服务, 解决你的烦恼:)
尺寸: 大约 9 X 12 寸
价钱: 一张 RM1.70 (0.55美金)
每次定购最少5 张, 订购时请清楚地例出购买的颜色和张数
颜色名称请参考上面的图画。更清晰的照片请看这里。
P/S: E6 - out of stock E6 - 缺货
Please place your order here. Shipping method please see here.