 |
| http://creamamma.blogspot.com/ |

Showing posts with label Box. Show all posts
Showing posts with label Box. Show all posts
Thursday, August 29, 2013
Saturday, August 13, 2011
Felt: Mini Cake Box
Tutorial found at Deviant Art. You can click at the picture for larger view or click at the source link for original size. You can make this box as a gift box or accessories box.
Materials and tools you need: felt, scissors, cardboard, glue, thread, ribbon.

Materials and tools you need: felt, scissors, cardboard, glue, thread, ribbon.

Monday, February 21, 2011
Fabric: Origami Box
So sorry for not maintaining this website for weeks. Was very busy and sick for the past few weeks. Busy with the Chinese New Year preparation, celebration and house keeping. Will be back on track soon.
Today, I would like to introduce a fabric origami box. See the instructions prepared by How about orange. Click here to view how the box being made.

Today, I would like to introduce a fabric origami box. See the instructions prepared by How about orange. Click here to view how the box being made.

Friday, November 19, 2010
Felt: Tissue Box Cover
Tutorial by Martha Steward on this simple tissue box cover.

After you made the base cover, then you can add some other design like flowers, insects etc...
Here are some samples

vicffie
After you made the base cover, then you can add some other design like flowers, insects etc...
Here are some samples

vicffie
 |
| Merryage |
 |
| shop33884230 |
 |
| http://auction1.paipai.com/ |
Saturday, October 16, 2010
Paper: Gift Boxes


Wednesday, August 11, 2010

Thursday, April 29, 2010

Wednesday, April 28, 2010

Friday, April 23, 2010

Wednesday, March 31, 2010

Saturday, March 13, 2010
Card: matchbox

Sunday, January 10, 2010

Tuesday, November 10, 2009
Source: http://lovelydesign.blogspot.com/
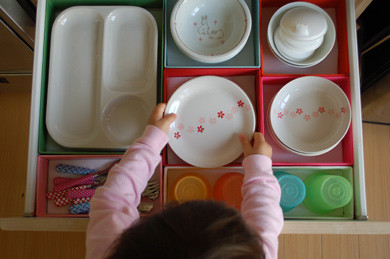
To create a love box organiser to suit your drawer, you can refer to this instructions (in PDF).
Monday, November 2, 2009

Sunday, September 20, 2009
Fabric bucket tutorial
Resource: pippijoe.blogspot.com

 Enough of all the containers!!! This is the last post about them I promise! I've been asked a few times for instructions on how to make them so I thought I'd post a tutorial. This is a very easy project. The hardest bit is to get the base and the sides to meet up neatly. If anyone has any tips on how to make that easier - please share!


 That's all - enjoy!

 Enough of all the containers!!! This is the last post about them I promise! I've been asked a few times for instructions on how to make them so I thought I'd post a tutorial. This is a very easy project. The hardest bit is to get the base and the sides to meet up neatly. If anyone has any tips on how to make that easier - please share!
 That's all - enjoy!
Tuesday, August 25, 2009
Fabric Box tutorial
I didn’t forget about you ladies. We’ve just had a lot going on.
Added: info to step 3.
Disclaimer: I’m not the best at following directions, including patterns. I sort of just dig in and work it out as I’m going. I’m sure there is probably a more professional way to go about this style of box but this is how I made it. So forgive me, if it’s a little confusing. I will try my best to make some sense out of all this. If you have any questions just let me know. With that said, let’s do it. And please do share with me, if any of you craft up some of these cute containers.
 Â
Â
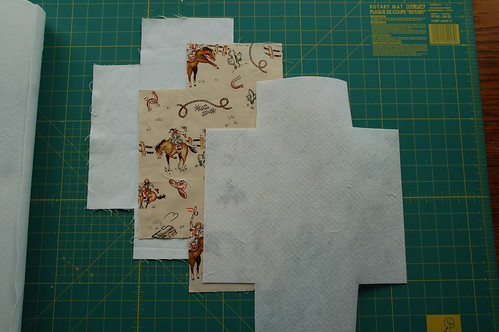
1) First decided what size of a container you want. This one will be 6″ X 9″. I went ahead an drew my pattern on the wrong side of the outside fabric. You can also just use a pattern you made out of paper. If your box is to be 6″ X 9″ make sure to add a 1/4″ to it. So my rectangle was 6 1/4″ by 9 1/4″. Then once you have the rectangle or square drew, then add the 4 side flaps. These will be your side walls. These are 3 1/4″ for a finished side of about 3″ tall. And when your done you will have a piece of outside fabric that looks similar to that in the above picture.
2) Now cut out your inside linning fabric. I use my first piece of fabric as a pattern. Trace it. Then add about a 1/4″ to a 1/2″ to the length of each of the 4 flaps. So it will make them a bit longer than the outside lining was. If you are wanting a larger amount of lining to over lap the edge of your finished box, then add more. This can be alter to what ever you want. More or Less over hang.
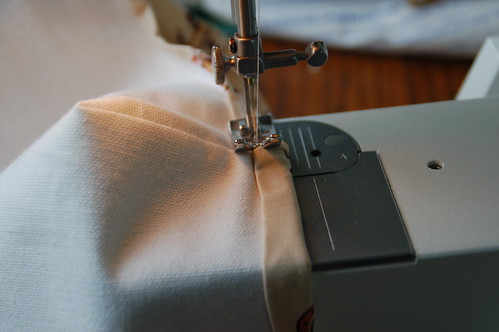
3) Now you need to cut another piece out of firm stabilizer. Use your first piece or paper pattern again. But this time cut about 1/2′ off of the 4 flaps. You don’t need the stabilizer to go all the way to the edges as you will be turning it down. Added: In the first fabric box I made I did not cut a 1/4″ off of the flaps sides (the V corners) but with this one I did. You can see in the picture of me sewing up the corners that the stabilizer is a little smaller than the inside lining fabric.  I’m not sure which is the best way if it matters. I will have to make a few more to see which way is the best way.
Confused yet? You should have 3 pieces now. The outside fabric that is close to your finished size. The inside lining fabric that has longer flaps than the outside fabric and stabilizer that has shorter flaps than the outside fabric.
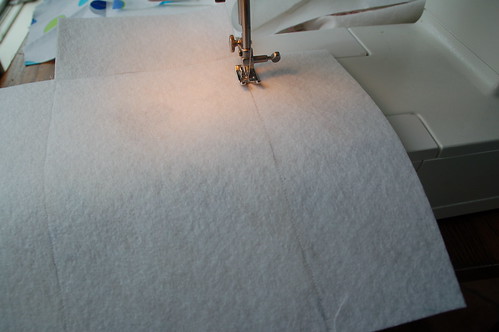
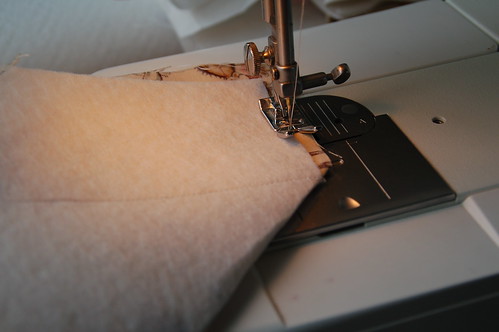
4) Now take your inside lining fabric and attach the stabilizer to the wrong side of the lining fabric. If you have the iron on kind, do that. I didn’t so I had to sew it on as well as help make the shape of the box bottom. Sew along where the box bottom dimensions are. See the picture below. Leaving the 4 side flaps alone. Make sure to keep the fabric nice and tight or you will end up with loose and wavey fabric like I did. I had a good excuse as I was having a very import conversation with a toddler that just had to help. It’s ok as this box is staying her with a horse loving girl.
 Â
Â
On to the corners…..
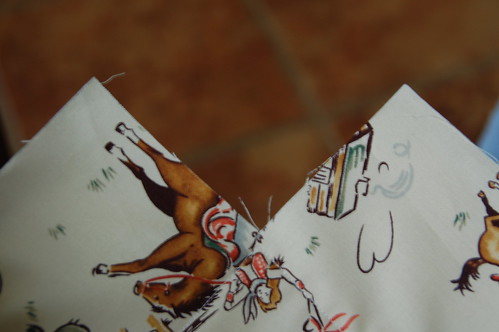
5) Now start turning it into a box shape. You take your inside lining fabric that has the stabilizer attached to it and put right sides together on the corners and sew them together (pic below). Do this to all 4 corners.
You will end up with up this.
6) Now on to the ouside fabric. If you are wanting to embellish it or embroidery it, probably should do it now before sewing it up. Do the same thing with this piece of fabric as you just did with the lining. Corners Right sides together, sew them up. All 4 of them.When you are done. Turn it right sides out.Â
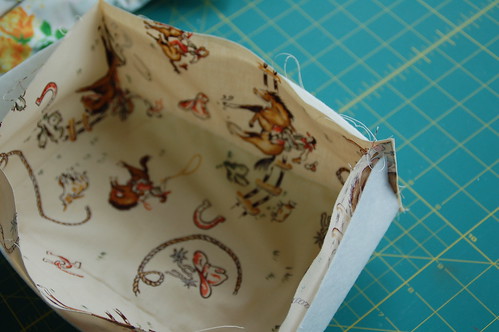
7) Take the lining box you made and place it inside the outside fabirc box that has the right sides out.  Work it around, there should be inside lining evenly sticking up above the outside fabric. Once you are happy with it. Pin it in place.
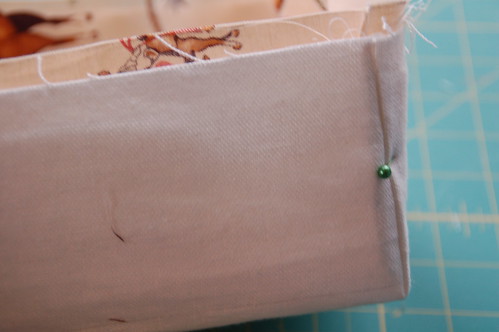
![]() You can turn it down once and sew it.  I didn’t want to see 2 seams so I turned mine down about a 1/4″ and glued it, using Fabric-Tac.  If you didn’t want to use glue because you will be sewing through this, you could opt for the iron on fusible web.Â
You can turn it down once and sew it.  I didn’t want to see 2 seams so I turned mine down about a 1/4″ and glued it, using Fabric-Tac.  If you didn’t want to use glue because you will be sewing through this, you could opt for the iron on fusible web.Â
 Â
Â
If you do use glue make sure it is completely dry before going on to the next step. And make sure to glue the corners nicely.
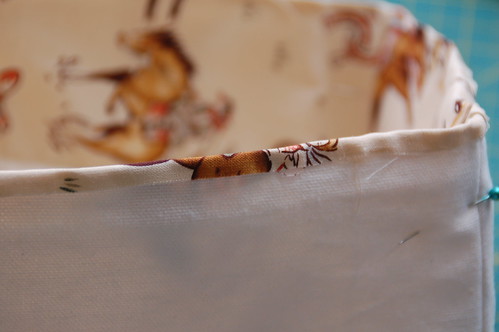
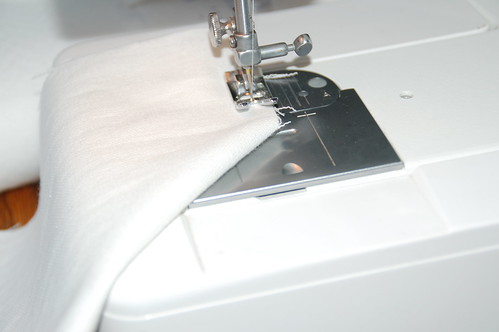
9)Turn it down on more time. How ever much you like. Sew it completely around like pictured below.
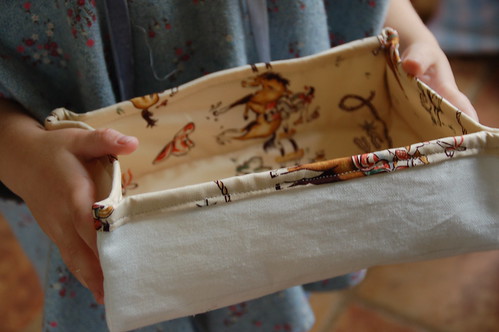
Now you have your box.
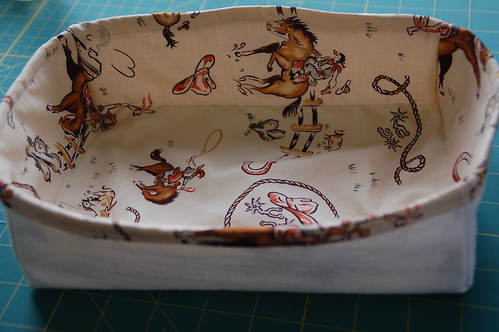
10)You can leave it like this or tighten up the sides, by sewing them like the picture below. Pinch the corners together to see where they meet and sew it up nice and tight. Using embroidery floss or a double thread is best.
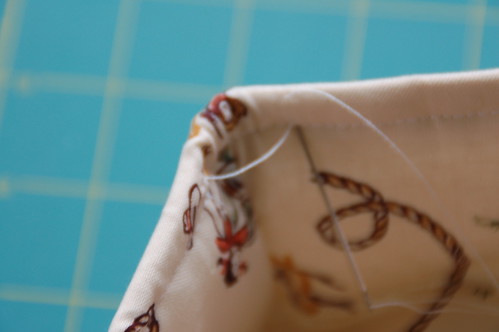
And your finished and have a cute box to fill with goodies.
Flat Fold Gift Boxes
Resource: A Necessary Creativity
WHAT YOU WILL NEED: For a 3″ x 3″ box
Decorative card stock (sturdy double sided ) cut to 10.5″ x 3 1/8″ (I used Parisian Breeze specialty dp from Stampin’ Up!)
Coordinating card stock (for inner box body) Cut to 6″ x 6″
Strong small magnets (Basic Grey magnetic snaps work well)
Adhesive

STEP 1: Score your 10.5″ decorative paper at 1.5″, 4.5″, 6″, and 9″ so it can fold as shown above.
STEP 2: Score your 6″ x 6″ card stock at 1.5″ in on all four sides.

STEP 3: Fold two side in to meet at the middle, as shown above.
STEP 4: Score the four corners on the diagonal, as shown above.

STEP5: Crease all scored lines well for easy folding.

STEP 6: With long decorative paper laying flat (the side that you choose as the inside of your box facing up), place and adhere the inner box on top, lining it up just inside the the bottom edge. The score lines on both pieces will line up perfectly. See photo above.

STEP 7: Once the two pieces are adhered together, open the folded edges and apply adhesive only to the outer four corners, as shown above. Close in the edges again to adhere well.
The magnet should be adhered to the center bottom (between the glued corners). The other magnet should be adhered to the top center flap. Sorry, no picture of this, but I think you get the idea. The top flap magnet is concealed behind the ribbon in the photo below.


You can make 2.5″ x 2.5″ boxes by simply using DP cut to 8 3/4″ x 2 5/8″. Scored at 1 1/4″, 3 3/4″, 5, and 7 1/2″. The inner box piece would be 5″ x 5″. Scored at 1 1/4″ on all four sides.
I hope you enjoyed the tutorial. I tried to make this as clear and concise as possible. If you have any questions, feel free to ask!
Have a creative day and see you again soon!!
Subscribe to:
Posts (Atom)
Felt supply 不织布出售 (taking orders now~)
After seeing so many felt handcraft and you wish to make some for yourself and friends but do not know where to get the felt supply?!
I'm please to announce that I'm providing this service.^^
Measurement: approximately 9" x 12"
Price: RM1.70 per piece (0.55 USD)
Minimum order is 5 pieces of felt and the colors are as follow:

Click here to view larger picture.
When you place the order, please indicate the number of pieces for each felt color.
看了那么多的不织布手工和教程, 是不是也引起你的兴趣想给自己或朋友做一个? 是不是不知道要到那里购买不织布呢? 呵呵, 这一回你们不用再烦恼啦!! 从今天开始我就提供不织布销售服务, 解决你的烦恼:)
尺寸: 大约 9 X 12 寸
价钱: 一张 RM1.70 (0.55美金)
每次定购最少5 张, 订购时请清楚地例出购买的颜色和张数
颜色名称请参考上面的图画。更清晰的照片请看这里。
P/S: E6 - out of stock E6 - 缺货
Please place your order here. Shipping method please see here.
I'm please to announce that I'm providing this service.^^
Measurement: approximately 9" x 12"
Price: RM1.70 per piece (0.55 USD)
Minimum order is 5 pieces of felt and the colors are as follow:
Click here to view larger picture.
When you place the order, please indicate the number of pieces for each felt color.
看了那么多的不织布手工和教程, 是不是也引起你的兴趣想给自己或朋友做一个? 是不是不知道要到那里购买不织布呢? 呵呵, 这一回你们不用再烦恼啦!! 从今天开始我就提供不织布销售服务, 解决你的烦恼:)
尺寸: 大约 9 X 12 寸
价钱: 一张 RM1.70 (0.55美金)
每次定购最少5 张, 订购时请清楚地例出购买的颜色和张数
颜色名称请参考上面的图画。更清晰的照片请看这里。
P/S: E6 - out of stock E6 - 缺货
Please place your order here. Shipping method please see here.